If you live in a place with your own garden, one of the most effective ways of dealing with garden and food waste is through composting. This can give you a steady supply of soil nutrients for no cost at all over time and minimal initial outlay. You have a number of choices for how to do this: the cheapest is to dig a hole or a trench about 30-50cm deep in a sunny corner of the garden. This allows moisture to be retained if you live in a relatively dry area - an essential part of the composting process. The disadvantage of the "hole-in-the-ground" method is that the decomposed material will be at the bottom of the hole, making it quite difficult to access. If you live in a wet climate, you can simply pile the compost in a heap on the ground, which will prevent the compost heap from getting waterlogged, but this method can be quite untidy.
The much neater alternative is to acquire a box or container (an old municipal waste bin is an ideal size, or you may be able to get a discarded metal oil-drum).
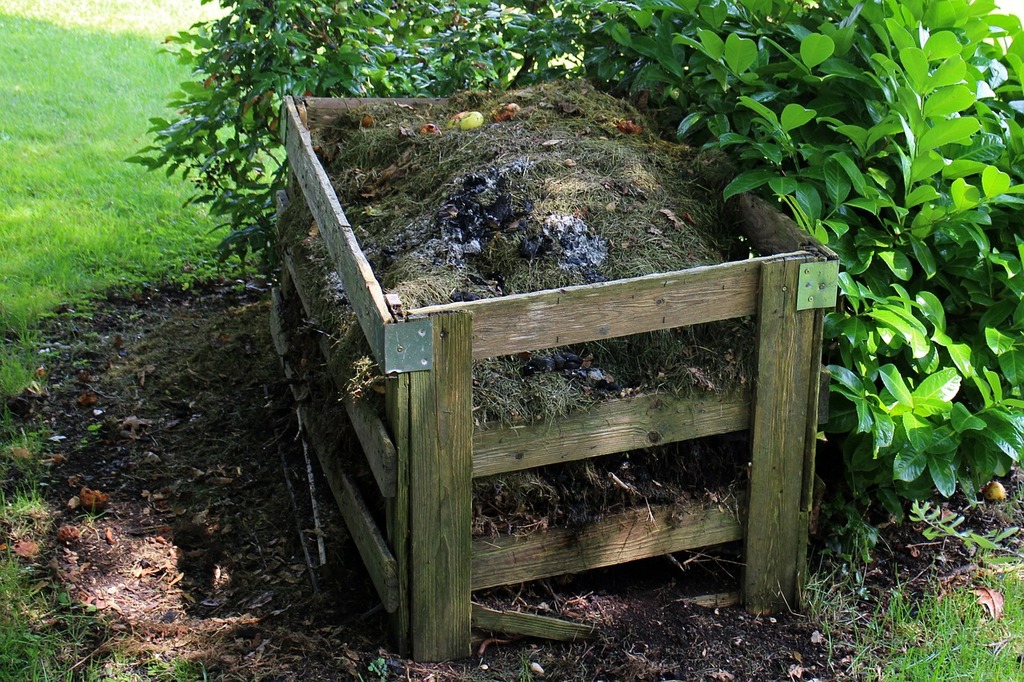
If you are making a box, a good size is about one square metre in area and at least 50cm high. As you can see in the photo, this box is made of slats, which is ideal for ventilation, but you may want to line the inside with mesh so that the contents don't spill out of the sides. You can leave the bottom of the box open providing you leave a gap before the lowest slat on one side so that you can access the ready compost.
If you are recycling an old metal drum or plastic dustbin, it is important to cut out the bottom so that the decomposed material can be collected at the base of the composter. If you want to save yourself time in the future, you can attach a coarse mesh to the underside - this will mean that only the fine compost will filter through, so you will not need to sieve it. When you have finished preparing your container, place it on three or four bricks or large stones to lift it off the ground. This will allow the decomposed material to be accessible from the bottom. Try to find a sunny spot in your garden, as this will help to speed up the process, but this is not essential in a warm climate, as the composting generates its own heat.
If you cannot find a suitable container, you can buy one from your local garden store, either of plastic or a wooden box like I have described. The plastic bins are usually supplied with a lid, which is a great idea for two reasons - it keeps the smell and flies under control and it helps to retain moisture.
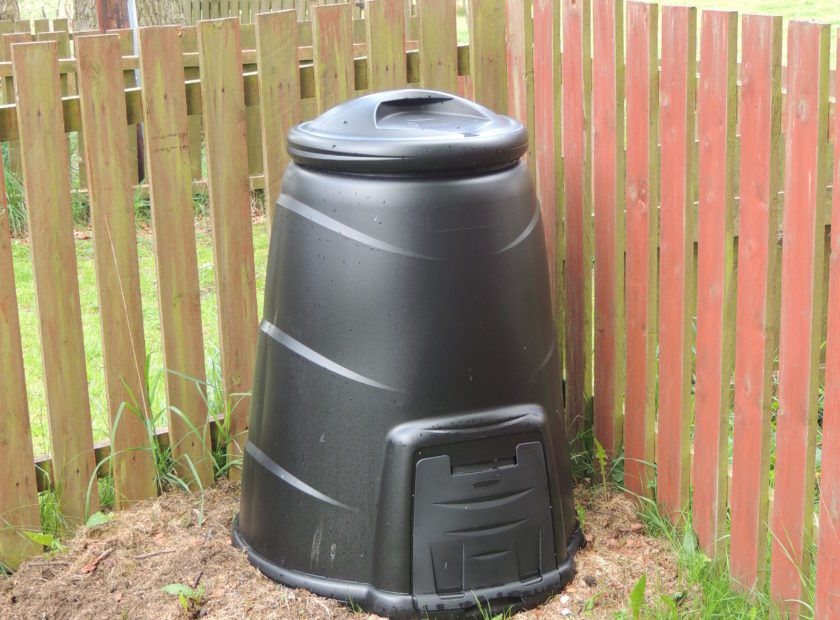
You can see in the photo that this custom-made composter has a door on the side at the bottom to access the compost, so that you don't have to lift it off the ground.
Now it is time to start filling your container. You want to have quite thin layers and if possible, alternate dryer material (such as dead leaves) with more juicy such as vegetable peels or green plant cuttings - aim for a maximum thickness of 2cm for each layer. This can often be quite a challenge, especially if you have had a big garden tidy-up raking leaves or mowing lawn, but on days like these, put the bulk of the material in a bag on the side of your composter and keep adding a little every day, preferably interspersed with some vegetable peels to help aerate and moisten the stack. Add a little water with each "dry" layer as this will help to speed up the decomposition - you are aiming for a moist environment, but not too soggy.
After about six weeks, the first of your compost should be ready - check the bottom of the container and if the material is a fairly uniform dark brown and crumbly, and there are few large pieces, it is time to harvest. Conditions in a composter can be highly varied, so you may need to be patient, but if it is very slow, this could be because there is not enough moisture, so give it a good damping down once a week.
I find that it is best to sieve the compost before using it, to remove the bigger pieces and solid items such as fruit pips and stones. When you are pruning, try to cut the pieces of plant to a maximum of 5cm and likewise when you are raking leaves, break up any dead branches into small pieces. You will need to use your judgement when sieving - much of the material that does not pass through the mesh can be recycled back into the composter, but try to remove stones and fruit pips, and any other material that looks like it will never decompose.
While you can compost almost any green waste, some things are best avoided in a domestic compost maker. Tree bark takes forever to decompose, as do palm leaves. I also avoid very woody cuttings when pruning, but green cuttings are great, especially when cut into small pieces. You can put weeds into the compost, as the heat from the process kills the seeds, but I avoid blackjacks, as they somehow survive, no matter how well managed your system. It is best not to add pet excrement, unless your pets are vegetarian - rather put this into biodegradable poop bags in your municipal waste.
As far as food is concerned, avoid meat, chicken and fish as these can turn your compost maker into a biohazard! You can add crushed eggshells, as well as broken-up egg boxes and newspaper, but be careful with other paper, especially shiny magazines, unless you have a shredder to speed up the decomposition. Coffee grounds and tea bags are great, and you can add food that has started to rot, including fruit that has dropped from your trees. However, most citrus fruit peels are very slow to decompose, but can be recycled in other ways, such as drying them to include in pot pourri or candle-making - they are great as a bug deterrent!
If you have a friend who is a compost maker, ask them if they have earthworms - these hugely improve the quality of the compost as the eat the plant and vegetable material to produce castings that are rich in nutrients and help to aerate your composter. A number of companies also sell worms, and some even sell complete worm farm systems, although these can be quite expensive. If you have earthworms, be sure to return them to the compost maker when you are sieving, so that they can continue their good work.
I have found a wormery to be an extremely efficient way of breaking down food waste and it produces the most amazing compost and liquid feed!
ReplyDelete