
Rain gardens

 Last year I wrote a blog on green roofs, so today I want to follow up with a much smaller and more versatile type of green infrastructure, the rain garden, sometimes called a bio-retention cell. These can be introduced into a small corner of your garden and have even been used as slightly modified planters along roadways where there is not enough space for a more extensive vegetated installation such as a swale.

File:Planted brick swale, balfour street pocket park.JPG - Wikimedia Commons
A vegetated swale
Creative Commons Licensed: 
https://commons.wikimedia.org/wiki/File:Planted_brick_swale,_balfour_street_pocket_park.JPG
One of the most severe environmental impacts of urbanisation is that the porous soil and vegetation of the natural landscape is replaced by impermeable materials for buildings and roadways. This prevents rainwater from seeping into the soil and replenishing the groundwater (the water naturally stored underground) and becoming cleaned by percolating through the plants and soil before returning to the natural water courses. In urban areas, the storm-water is channeled into a piped system, which causes flooding when it is overloaded, and the pollution that accumulates on surfaces, such as oil on roadways, is washed into the pipes and onwards to rivers, lakes and eventually into the sea.

Green infrastructure imitates nature as far as possible, often taking on even more of the role of water permeation and pollution removal as a small area of vegetation now needs to do the job of the much bigger area taken up by a building or roadway. A rain garden is the smallest of these and can be fitted into a tiny space, as little as one metre in diameter. 
How Do You Build a Beautiful Rain Garden at Home?
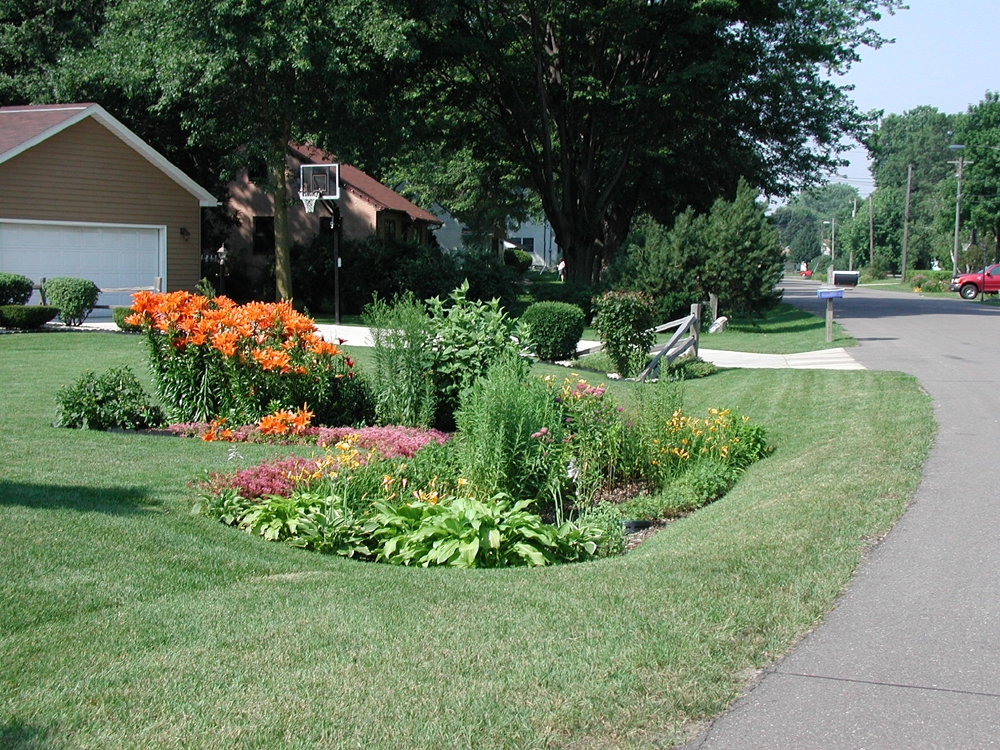
A well-established rain garden
Creative Commons Licensed: 
https://homedecomalaysia.com/how-do-you-build-a-beautiful-rain-garden-at-home/
The principle of a rain garden is to direct the runoff (from a roof or paved area) to a point that is lower than the surrounding landscaping, where it can briefly form a pond before percolating the rain-water into the ground. For this reason, it is normally located close to a rain-water spout or down-pipe, but ideally this should be extended so that the rain garden is about a meter away from the wall of the building to prevent rising damp.

File:2006NeighborsNewRG2.JPG - Wikimedia Commons
A newly installed rain garden with extended rain-water spout
Creative Commons Licensed: 
https://commons.wikimedia.org/wiki/File:2006NeighborsNewRG2.JPG
To construct a rain garden, you first need to dig a hole the area of the planned planting and about 60 to 75 cm deep. Keep the topsoil on one side, as you can re-use it when backfilling. Loosen the ground at the bottom of the hole, and then put down a layer of stones or clean broken bricks to form a permeable layer about 10 cm deep. Mix the topsoil and some of the soil taken from lower down with some compost or potting soil - you will want less material than you dug out of the hole, as the final level of the rain garden needs to be about 10 cm lower than the surroundings.

Choose plants that are water-loving, but preferably quite hardy, so that you don't have to water them in the dry season. My favourite for all green infrastructure in Johannesburg is plectranthus neochilus, as it loves plenty of water but is very hardy in our dry winters.
If you are doing new paving near the rain garden, here is a great opportunity to channel the runoff into the garden rather than into a roadway or storm-water outlet. Try to give the paving a very gentle gradient, so that the water will flow quite slowly into the garden and prevent erosion. 

You may find, after you have completed the garden, that your rain-water outlet is scouring away the soil, so you may want to install a splayed outlet to disperse the water. Alternatively you may be able to fashion a spray to the end of the outlet using a plastic bottle cut in half with holes in the bottom similar to a showerhead. 

Your rain garden, unlike many other types of green stormwater installations, does not need any special maintenance, just the normal trimming and tidying that you would do for a normal flowerbed. Once a year, just before the rainy season, it is good to loosen the soil around the plants to encourage drainage. At the same time, you can place mulch around the plants but this is not essential.


Comments

Popular posts from this blog

Welcome to my blog

Sitting outside the Wits Architecture Building My name is Anne. I have just retired from the University of the Witwatersrand in Johannesburg, South Africa where I was an Associate Professor in the School of Civil and Environmental Engineering, working in the environmental engineering and project management domain. Prior to that, I was a lecturer in the School of Architecture and Planning, teaching many aspects of architecture, including architectural history, design and skills in graphics. Before lecturing at the University, I worked briefly in local government as a junior architect and then in a commercial firm of architects. After this I ran a private architectural practice with a focus on architectural heritage design. I have qualifications in architecture, construction management and employment creation through construction. Now that I have retired, I want to continue to provide educational context about architecture, engineering, design and project management in a different forum ...

Renewing deck chairs

 Welcome back to my blog in 2025! To celebrate the new year, instead of looking at new things, I wanted to share with you a refurbishment project that I have just completed. Forty years ago, my sister gave me two classic wooden deckchairs, with striking canvas seats in red, blue and yellow. These lasted for many years, but eventually, when the canvas had become rather worn and faded, I replaced it with plain white seats. In  a second refurbishment, they were transformed into beige stripes, but recently it was time to give them a new lease on life for relocation to my daughter's house. Stacked on my balcony for several years has been another chair frame passed on by a friend that I have never had time to refurbish, and in discussing my plans, another friend donated his old chair that he has not used in years. So with four chairs to renew, the first step was to remove the old canvas. Two of the chairs have the canvas fixed to the frame with blue tacks, which have to be very care...